
Dog guide
Picking and using the dogs in Tibo's pack. Every tip below is the same text as on that dog's page, which also has the numbers and sources.
 Scout
- Treat Scout as a luck dog that also scouts, not as a gold dog. The Dachshund drops 6 coins every 6 s at level 1, more than twice Scout's 3 coins every 8 s, and adds gold gain on top.
- Scout's luck aura works like Four-Eyed Spud (+0.1 per level) without using a passive slot. At level 5 Scout alone gives a 40% chance of a fourth level-up card, plus bigger chests and rarer items. See Luck.
- Pointing pays off most early in a run, while you still need to find a Fry Cart, Spud Whetstone or Dog Kennel. A Golden Retriever in the same pack pulls Scout's coins to Tibo.
 Moss
- The circle is small: 46 units is only slightly more than Tibo's base 40-unit pickup range. Moss is for crowds pressing against Tibo, not for keeping distance from ranged pests.
- The shove does nothing to bosses or very heavy pests. If those are the threat, a Corgi or Link fits better.
- At level 5 Moss's move-speed aura equals one and a half levels of Spud Sneakers (+8% per level). The Greyhound gives twice as much.
 Waffles
- Frozen pests take double damage from Permafrost Fries (
shatter2), and the check only asks whether the pest is frozen, not who froze it. A Corgi therefore feeds that evolution.[1] - The armor aura loses value as the run goes on, because armor is weighed against the attacker's level. +24 armor blocks about 32% of a hit from a level-10 pest at 0:00, but about 14% from a level-30 pest at 20:00. See Armor.
- Waffles cannot freeze a boss. In a boss fight its value is in freezing the pests that come with it.
 Frank
- Frank is the only dog that produces rerolls. The other sources are pickups, elite kills, the Seed Vault and Tater Lanterns. See Reroll, skip and banish.
- Training pays for itself quickly. Taking Frank from level 1 to 4 at a Dog Kennel costs 120 + 240 + 450 = 810 gold before the purchase-price multiplier. It raises the dig rate from 1 to about 4 gold per second, so the cost comes back in roughly four and a half minutes, sooner with gold gain.
- Coins land on the ground and still have to be collected. A Golden Retriever or Potato Magnet helps.
- Gold buys items at the Fry Cart, opens Potato Crates, spins Tater Slots and trains dogs, so an early Frank compounds over the run.
 Zoom
- Zoom averages 7.5 damage per second at level 1 and about 46 at level 5, before Tibo's damage multiplier. Every enemy on the line takes the full hit, so Zoom is best against dense crowds and lines of pests walking at Tibo.
- Against a single target the Jack Russell Terrier does far more: about 134 damage per second at level 5 against Zoom's 46.
- The move-speed aura at level 5 equals three levels of Spud Sneakers (+8% per level). That alone can justify keeping Zoom in a build that kites.
 Zelda
- Zelda is an elite killer. Elite damage from Bacon Bits or Boss Buster and the mark multiply each other.
- Taking curse adds extra elites (see Curse), which gives Zelda more targets.
- The +25% can help kill a loot runner before it escapes.
- Zelda does nothing against bosses. For the boss HP steps late in a run, look elsewhere for damage.
- If Link turns up, fusing them keeps Zelda's marks, adds Link's fluff and uses only one pack slot.
 Link
- Fluff blocks a hit regardless of its size, so it is worth most against boss attacks and other heavy hits. Armor, by contrast, loses value as enemy levels rise (see Armor).
- Dodge from Thick Skin or Ghost Skin is rolled first, so dodge and fluff don't waste each other.
- The recovery aura stacks with Root Network and the Saint Bernard.
- If Zelda turns up, fusing keeps Link's fluff, adds Zelda's marks and holds both in one pack slot.
 Biscuit
- Tibo's base pickup range is 40 units, so even a level 1 fetch reaches three times as far. The pickup-range aura works like a smaller Potato Magnet (+25% per level).
- A fetched magnet pickup still fires when it reaches Tibo, pulling in every gem and coin on the map.
- Snacks are fetched too, and a snack collected at full HP heals nothing. If you are saving a snack for later, keep Tibo more than Biscuit's radius away from it.
- Biscuit pairs well with dogs that drop loot on the ground: the Dachshund and the Beagle.
 Barrel
- The heal is a flat amount, so it matters less as max HP grows. At base 100 HP, a level 1 rescue is a quarter of Tibo's health; with Gravy Heart and HP items it is a smaller share.
- Barrel and recovery from Root Network (+0.25 HP/s per level) stack. A level 5 Barrel's aura alone heals 48 HP a minute.
- Barrel works best as a safety net against a sudden drop in HP. It does not replace dodge, armor or Link's fluff, which stop damage before it lands.
 Pip
- Pip is the strongest single-target dog. Bite damage divided by the interval gives about 24 damage per second at level 1 and about 134 at level 5, before Tibo's damage multiplier and misses.
- Because bites scale with Tibo's damage, Pip suits damage builds. The +3% damage aura per level adds a little more.
- Zelda's marks add 25% to every bite on a marked elite or loot runner, which makes Pip with Zelda a strong elite-hunting pair.
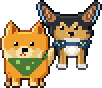 Zelda & Link
- One pack slot for both legendaries is the main gain: it leaves two slots for other dogs.
- Thanks to the eclipse charge above the cap, a Zelda & Link at level 3 or higher can hold three charges and cancel three hits in a row.
- The eclipse's +10% lasts only a second, so treat it as a minor bonus. The regular +25% marks matter more, especially with a Jack Russell Terrier biting marked elites.
Sources
Game version 75: main-CSuyb4iv.js / boot-CPW8VVmR.js / sim-BkfBhQfw.js from https://tibo.dog/, researched 2026-11-05. See Versions & updates.
- Tips sections of the linked wiki pages; each page lists its own sources
Code references
- sim-BkfBhQfw.js
o.shatter[r]>0&&t.freezeT[n]>0&&(d*=o.shatter[r])